Welcome to the 21st century! Here we discuss how to use google forms.
Today, search engines have replaced yellow pages. TV and cinema halls have been replaced by Netflix and YouTube.
Magazines have become blogs. And your classrooms have given way to Google classrooms offering teachers a wide array of online tools to enhance learning.
Also, project files have now become PDF files. Classroom presentations through a projector are now done on Meet classes with the ‘Present Screen’ option.
There is no blackboard anymore; the interactive Whiteboard or Jamboard has taken its place.
While a lot of aspects of the modern online learning method are making lives simpler for students and teachers, there is a lot that still requires a little getting used to. Especially for teachers who have spent years teaching via traditional formats, the mixed learning models are challenging.
But just like everything else, Google has a free, functional (and fun!) tool for making life simpler for teachers – Google Forms.
By now, most teachers have learned and mastered the art of creating simple Google forms surveys and Google Forms quizzes.
So, in this piece, we will be showing you three cool, creative, and useful ways to make the most of Google Forms for your lessons, no matter what you teach.
Read on.
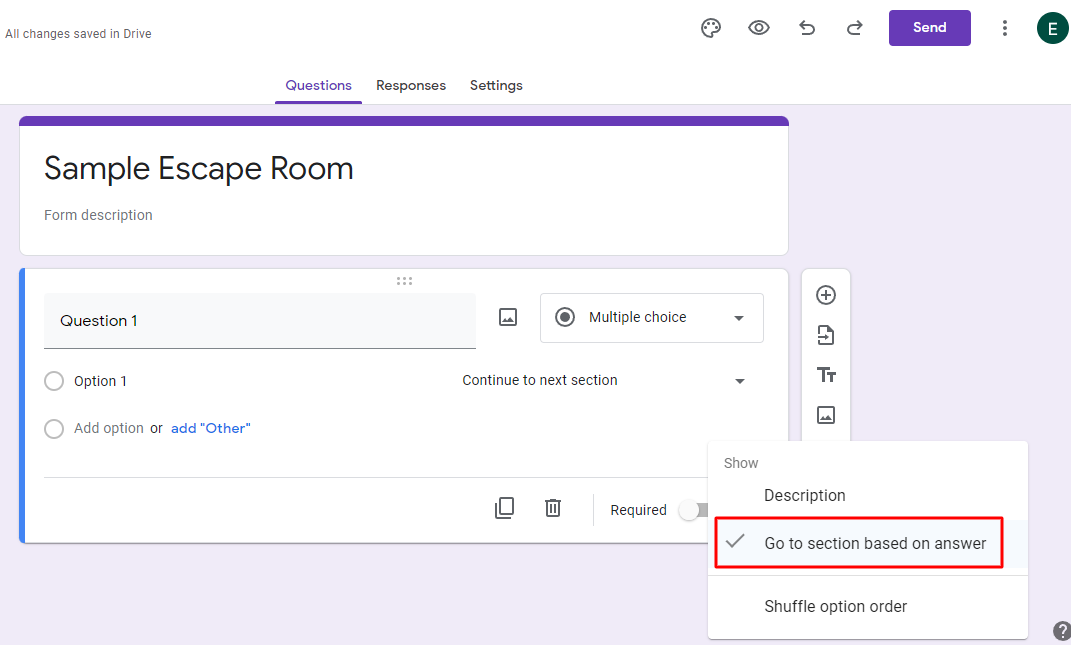
1. Use logic branching with Google Forms
Digital education sessions don’t have to be bland and boring. By following just a few simple steps you can add a gamification element to your class.
So, here’s what you need to do.
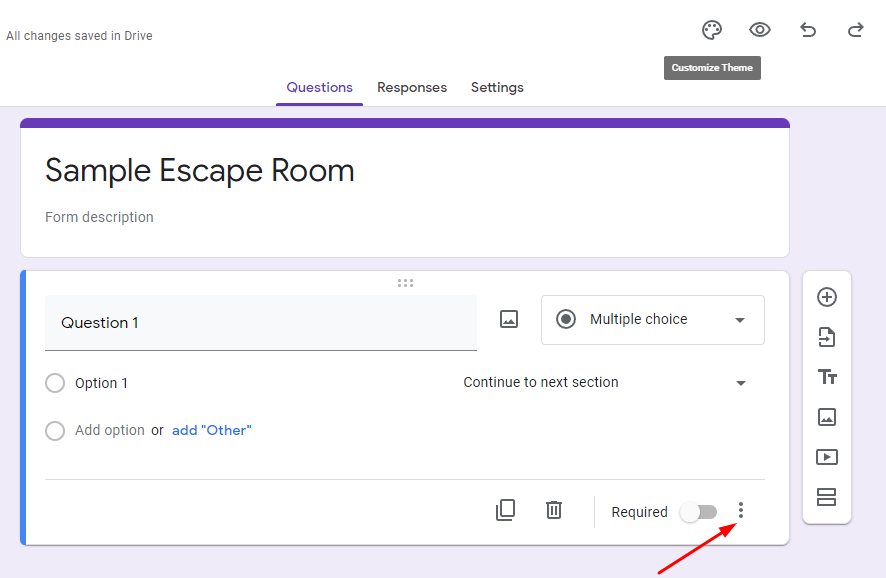
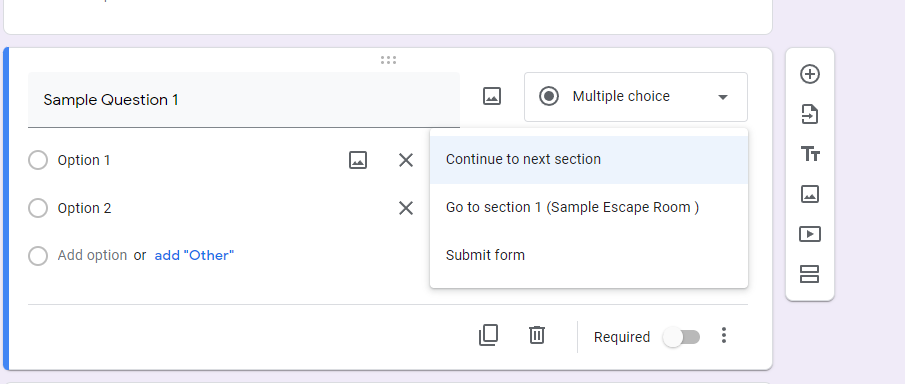
While creating the Google Form, click on the three dots as shown below:


Some ideas to get you started:
- In a comprehension-based test, students that answer a question correctly are directed to the next question and the ones who answer incorrectly are taken back to the reference text. This will give them a hint to read the passage carefully and attempt the question again.
- You can use logic branching to suggest books and give out reading recommendations to students. Based on which authors the students have read before and what genres they like, you can suggest books to your literature students. Or based on which questions your students get right or wrong, you can take them to sections suggesting which chapters they should be re-reading.
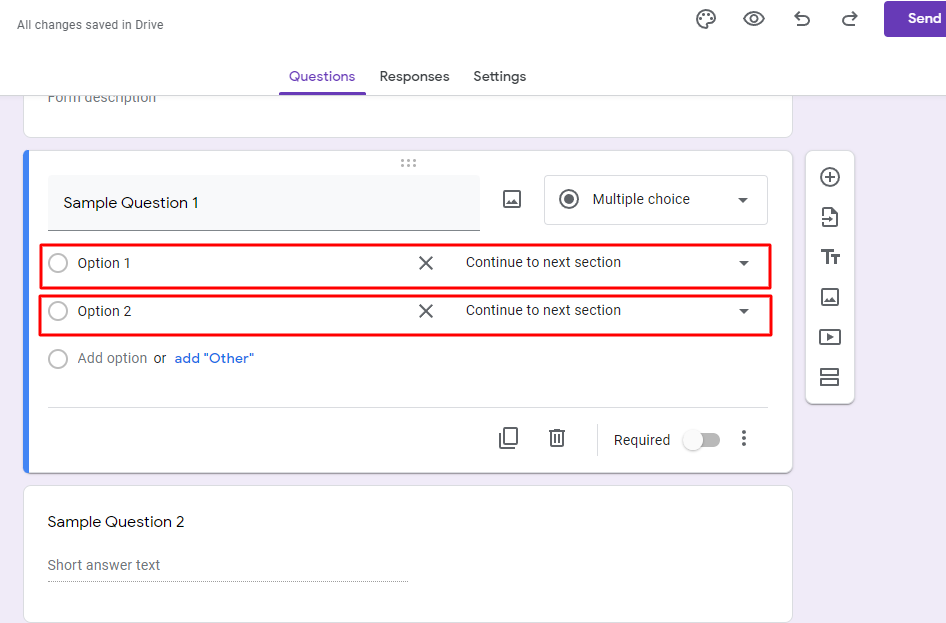
- Another fun use of logic branching could be to create an escape room through Google Forms. You can send out a list of hints and clues to your students and based on those they will have to figure out a set of codes. Upon entering the right code in the Google Form, the students will be allowed to submit the form and they’ll know they understood your hints and cues. The students who enter the wrong code, meaning they couldn’t crack the hints, will be shown an error message that tells them to think harder and try again.
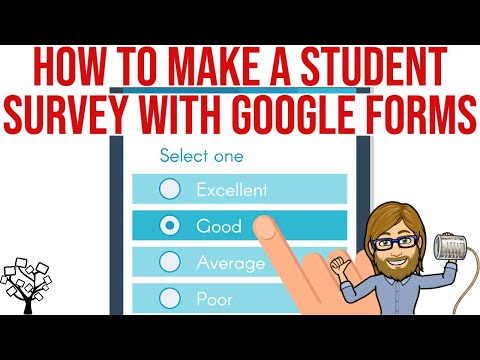
- If you want to use Google Forms to create surveys for students, parents, or colleagues, you can watch this video tutorial:
2. Use Google Forms for attendance tracking (foolproof strategy)
It gets tough to keep a track of which student attended the class and who didn’t. Also, the smart students of the 21st century often have multiple tricks under their sleeves with which they try to get attendance for even the classes they haven’t attended.
But with Google Forms (and using it with Google Sheets), you can capture the actual student attendance in any class.
Here is how you can use Google Forms to create a foolproof attendance sheet.
Start by creating a simple form that requires students to enter their names and the date for which they are marking their attendance. (Don’t forget to make it a requirement to enter the name to be able to submit the form.
You can change the format of the date question to ‘Date’ from the drop-down menu.
![]()

![]()

![]()

Now, when you get the responses from the students, all you must do is go to the Google Excel sheet, and there you’ll be able to see a list of all the students who attended the class and filled the attendance sheet after class.
However, the best part is that in the first column of the sheet, you can see the timestamp of when the form was filled.
![]()

And when you see students entering incorrect dates in the attendance records you can send them a warning email to mend their ways and actually attend their class.
This cool little way to keep students under check will sure earn you the title of ‘tech-forward teacher’ in your class. Watch the video tutorial below for more guidance:

3. Collect Lab Data with Google Forms
Science lab sessions are fun. Collecting data is not.
Google Forms has this really cool feature that lets you see a summary of the data that you have collected through the forms.
So, when you have a Science Lab or STEM session, make sure you ask the students to input their findings in a Google Form. And when everyone is done submitting the responses, you’ll automatically see the numerical results in a graphical form.
This not just helps you get processed data but also ensures that you have a proper record of who did what and how in the lab.
More useful tips and tricks for using Google Forms:
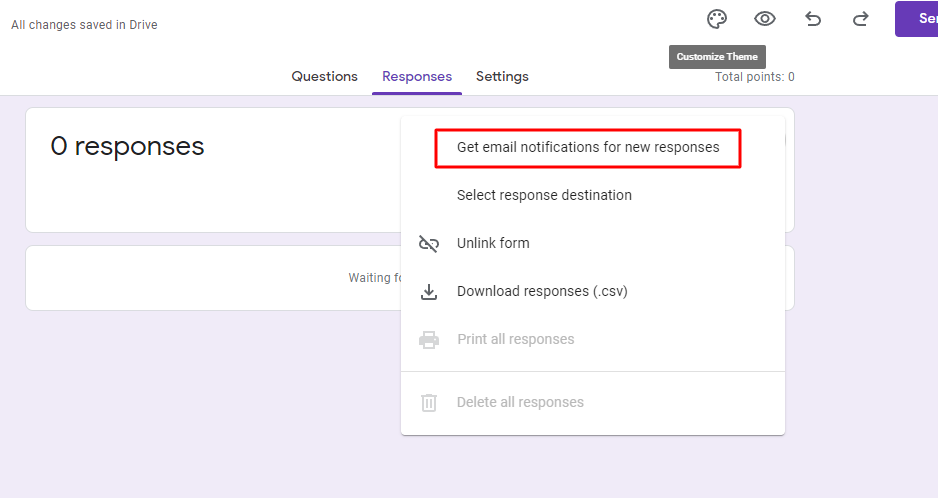
- Want to know when students submit their forms? Keep the ‘Get an email notification for new responses’ option checked.

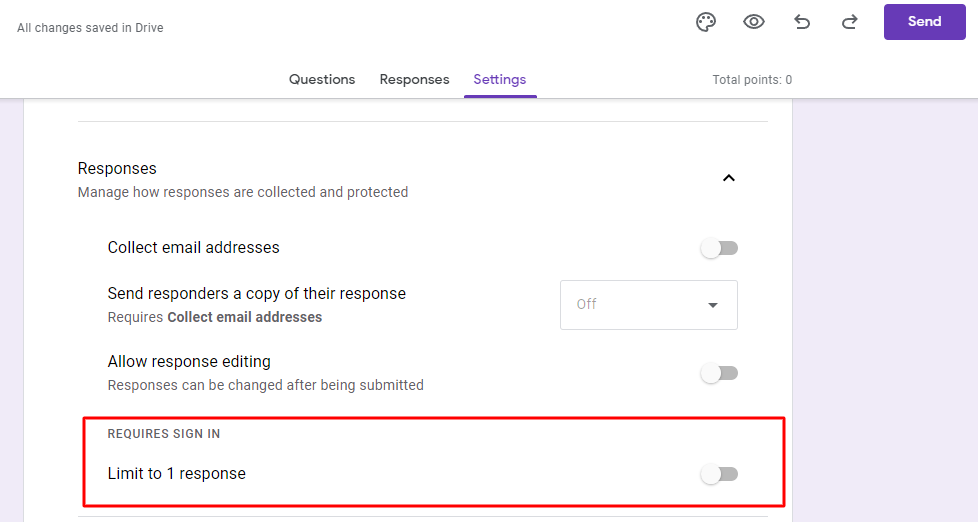
- Check the ‘Limit to one response’ option to prevent students from taking the test/quiz/survey multiple times. The option is available in the Settings tab:

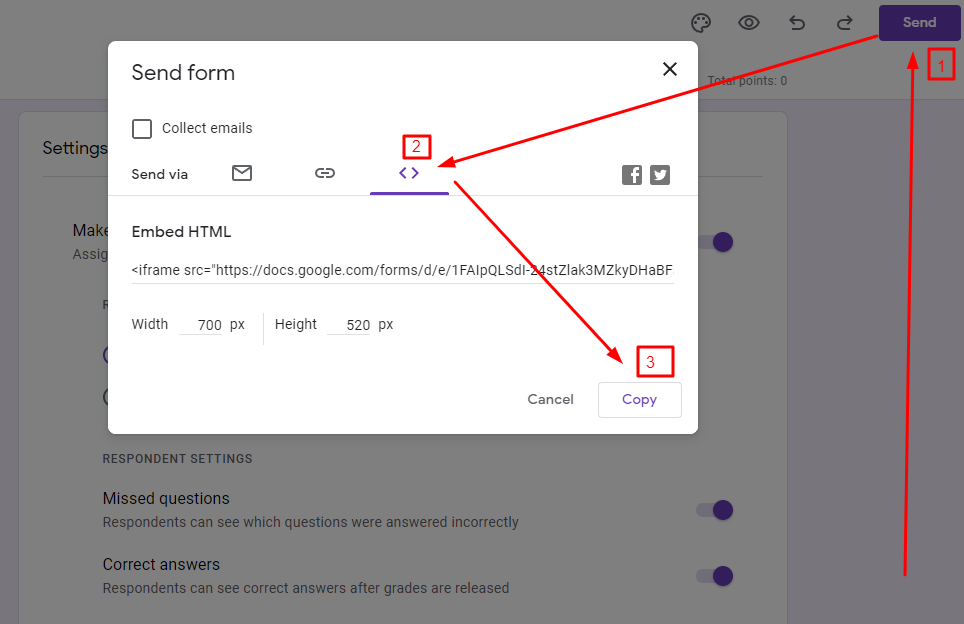
- While it is common knowledge that you can share the Google form via a link or an email, know that you can also use it on a website or landing page.
- Click on the ‘Send’ option
- Go to the third section
- Click on ‘Copy’ to copy the code and then paste it into the code editor of the webpage where you want to see your Google Form.

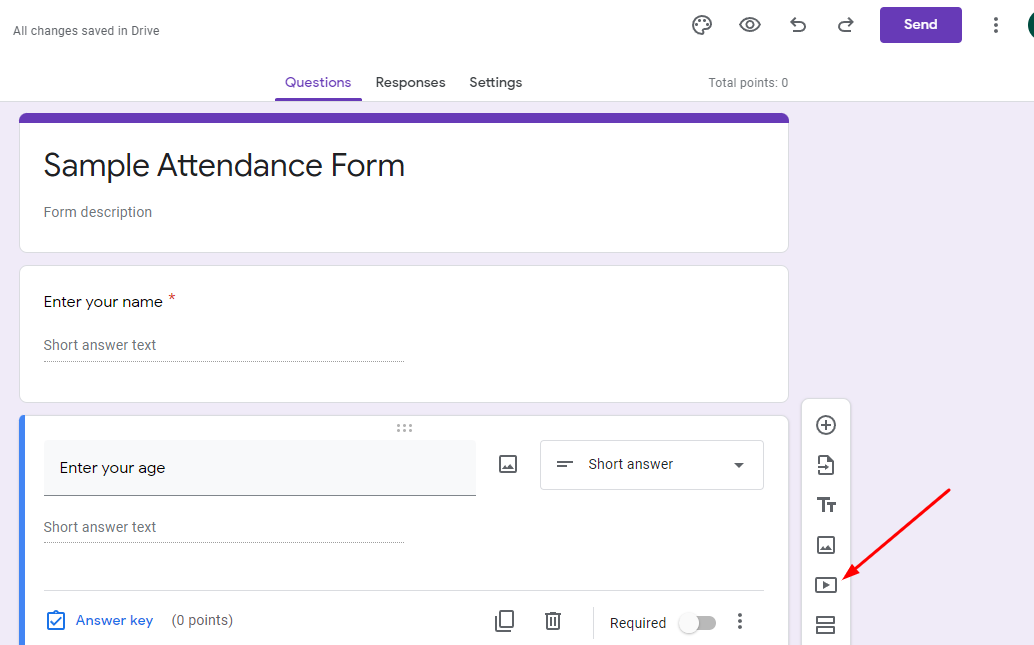
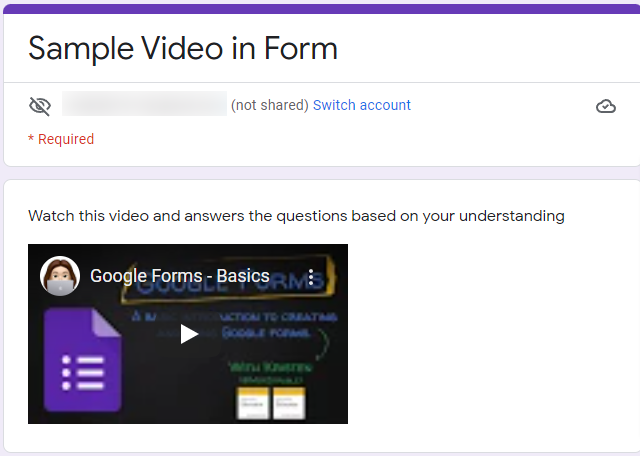
- Want students to answer a question based on their understanding of a video? You can also add a YouTube link directly to your Google form.
Click on the icon shown in the image below.


With that, it’s a wrap on the best ways for teachers to use Google Forms in a unique way. And surely you will come up with even more creative ideas so get in touch with us if you’d like to share them via our UK Education blog.
Author Profile


- Editor in Chief
- Blogger and Educator by Passion | Senior Online Media & PR Strategist at ClickDo Ltd. | Contributor to many Education, Business & Lifestyle Blogs in the United Kingdom & Germany | Summer Course Student at the London School of Journalism and Course Instructor at the SeekaHost University.
Latest entries