

Are you a teacher looking for easy yet effective ways to spice up your classroom or tutorial presentations with free tools?
Or perhaps you are a teacher trainee or student in need of designing exciting presentations.
Most teaching staff, trainees, and students will have free access to Microsoft Office and Google but wonder how to use PowerPoint or Google Slides and which software offers easier, more effective, and useful functions to create engaging, interactive, and impressive classroom presentations.
In this guide, we will take you through the most asked questions about PowerPoint Presentations and Google Slides Presentations to help you work out which software is the best match for you to showcase your physical or virtual classroom presentations.
Editorial note: both programs offer cloud storage options, and you should always check your organization’s guidelines or policies regarding data protection before you add any personal or sensitive data in such documents that you may share via the internet.
A Glance at Microsoft PowerPoint & its Best Features
Many teaching staff and students may be unaware of the options PowerPoint provides. It includes features for word editing, painting, highlighting, charting, and session administration. It is a presentation (PPT)-based application that consists of slideshows with images, movies, and other elements that make a lecture more engaging and fascinating when used right.
So, here’s how to easily use the best features without spending hours on one presentation.
How To Use Microsoft Office PowerPoint?
PowerPoint presentations function similarly to slide shows. You divide a concept or a narrative into slides to express it. Consider each slide to be a blank piece of paper for the content that will help you convey your main lesson input.
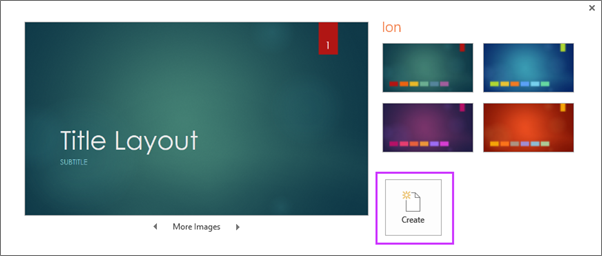
1. Select a theme
- When you launch PowerPoint, you’ll see various pre-installed styles and layouts. A theme is a presentation layout with matching colours, typefaces, and visual effects like shadowing, ripples, and others – this can be overwhelming so just pick one that goes with your topic or subject, don’t overthink it!
- Select New from the File tab on the Ribbon, and afterward pick a theme.
- On the right side, PowerPoint displays a sample of the theme with four color variants to pick from.
- Click Create or select a colour variant before clicking Create.
For more information check out some Microsoft tutorials.
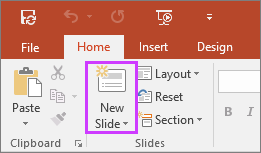
2. Add a Slide
- Select the bottom half of the new Slide on the Home tab, and then select a slide arrangement.
- If you’ve chosen a theme, it may give you different types of slides that you can add, duplicate, delete or change.
For more information head to: https://support.microsoft.com/en-us/office/add-rearrange-duplicate-and-delete-slides-in-powerpoint-e35a232d-3fd0-4ee1-abee-d7d4d6da92fc
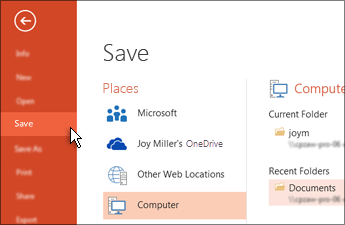
3. Preserve your demonstration
- Choose Save from the File menu.
- Choose or navigate to a folder.
- Enter a title for your PowerPoint in the File username field, then click Save.
For more information check: https://support.microsoft.com/en-us/office/save-your-presentation-file-34377c9c-a1e5-44e1-9c3f-e6e72ee6c541
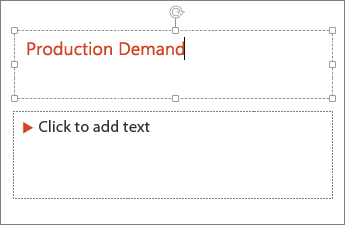
4. Add your text to your Slide
- Choose a text box and start to write.
- If you’ve chosen a theme you will already have text boxes available, but these can be edited, duplicated, or deleted.
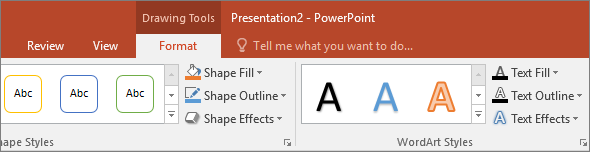
5. Format the text
- Highlight the text.
- Select Format from the Drawing Tools menu.
- Displays the Drawing Tools options on the PowerPoint ribbon.
1. Choose one of the various choices:
- Select Text Fill and then colour to modify the colour of your text.
- To modify the colour of your text’s outline, select Text Outline and then a colour.
- To add a shadowing, reflecting, shine, curve, 3-D movement, or transformation, pick Text Effects and then the desired effect.
- If you use a theme the text formatting will already be set, but you can change it according to your needs.
For more information check:
- https://support.microsoft.com/en-us/office/change-the-fonts-in-a-presentation-0109d7b7-4f3e-4d0a-b8a8-2604f21e977f
- https://support.microsoft.com/en-us/office/change-the-color-of-text-on-a-slide-26773c77-daad-4ef2-bed9-bf7ab3eed348
- https://support.microsoft.com/en-us/office/add-bullets-or-numbers-to-text-a6f1b87e-fca8-47da-ade9-5d99b7f41f04
- https://support.microsoft.com/en-us/office/format-text-as-superscript-or-subscript-e989637a-12ec-4fe5-8b04-345342408abd
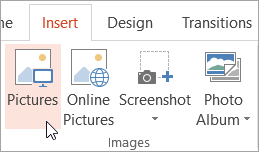
6. Add images to your Slide
- Choose one of the options on the Insert tab:
- To enter a photo from your local disc or an internal network, select Pictures, search for the image and then select Insert.
- To import a photo from the internet, select Online Pictures and browse for an image in the search field.
- Choose a photo and then press the Insert button.

7. Shapes and Icons added to your Slide
- Shapes or icons may be used to show your slider.
- Choose Shapes or icons from the Insert tab, and then choose a design from the list that opens.
- To design the design, press and move on the slide area.
- On the ribbon, click the Format or Shape Format option. To rapidly apply colour and design (including shade) to the selected shape, visit the Shape Styles library.
![]()
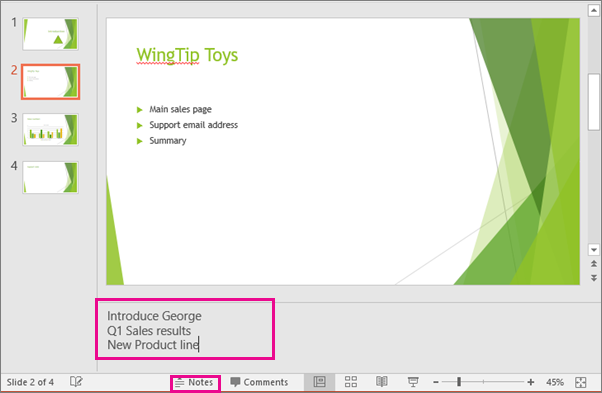
8. Include speaker notes
- Slides work best when you don’t jam too much-written content into them. You may include user data and short notes in your speaker notes and resort to them while you talk.
- To access the notes pane, select the notes icon in PowerPoint at the bottom of the window.
- Begin entering your notes in the Notes window underneath the slide by clicking inside it.
For more information check:
- https://support.microsoft.com/en-us/office/add-speaker-notes-to-your-slides-26985155-35f5-45ba-812b-e1bd3c48928e
- https://support.microsoft.com/en-us/office/print-slides-with-or-without-speaker-notes-02952fc2-2921-4305-b8b2-e98644a93e06
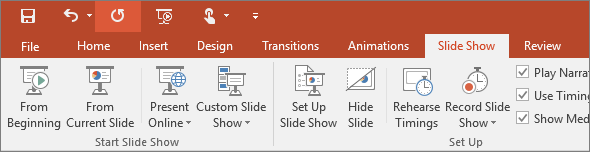
9. Deliver your speech in your Presentation
- Choose one of the options on the Slide Show tab:
- To commence the session from the first slide, click From Beginning in the Start Slide Show group.
- Displays the Slide Show tab on the PowerPoint ribbon.
- If you aren’t on the first slide and wish to begin where you are, click From Current Slide.
- If you need to show to those who are not available, click Present Online to create an online session, and then select one of the following scenarios:
- Send your PowerPoint presentation to a remote audience through the internet.
- While delivering your slide show, refer to your speaker notes.
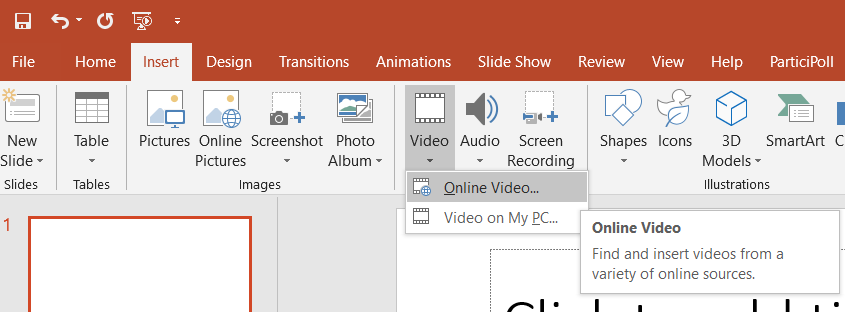
10. How To Embed A Video/YouTube Video In PowerPoint?
Embed A Video In PowerPoint
- Navigate to the page where you wish to insert the material in PowerPoint.
- Select the Insert tab on the toolbar menu, then Video, and finally Online Video.
- The Insert Video dialogue box is shown.
- Paste the embed code into the From a Video Embed Code box and hit Enter.
For more information check: https://www.youtube.com/watch?v=Wq2Lz2kANzU
Secret Classroom Presentation Hack
For a classroom presentation, if you embed a video relating to the topic you were teaching, it will be more illustrious. For example, if a history lesson on the Harappan civilization is being taught, a video showing the ruins would make the lecture more interesting and memorable. If you have footage of museum visits with your own commentary that would give your lesson a more personal insider touch.
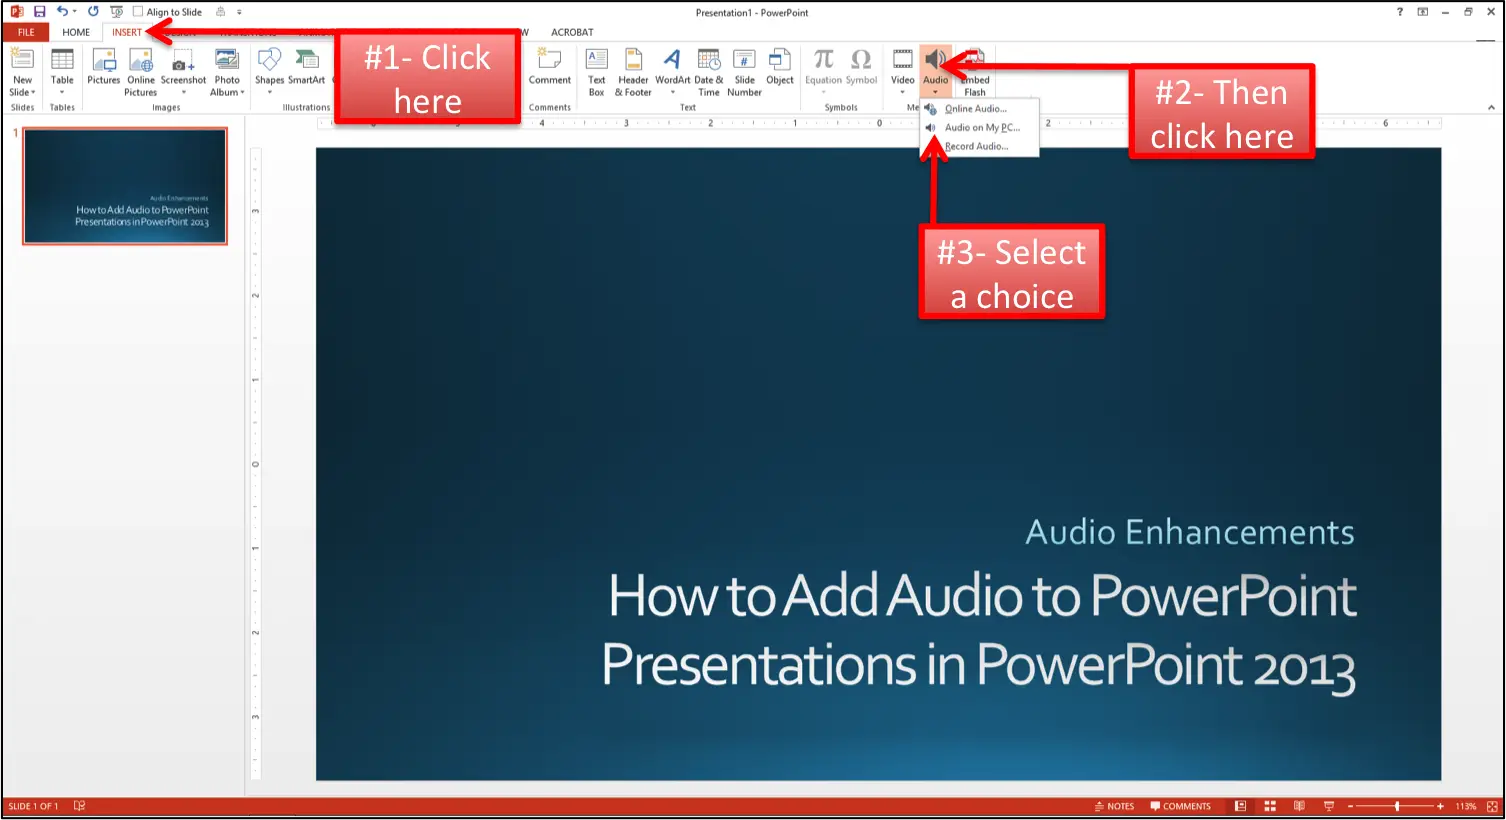
11. How To Add Music To PowerPoint?
The below-mentioned steps can be used to see how to add music to PowerPoint:
- Choose Audio, then Audio on My PC, from the Insert tab.
- Navigate to the particular song or audio file you wish to utilize in the File menu, then pick Insert.
- Select Play in Background on the Playback tab when the sound icon is chosen on the slide.
For more information check: https://www.youtube.com/watch?v=tBiwTRLVOd0
Secret Classroom Presentation Hack
We all know how boring and monotonous classes can be at times. So, why not add a bit of the kid’s favourite tunes or movie soundtracks to break out of the monotony and give them a break?
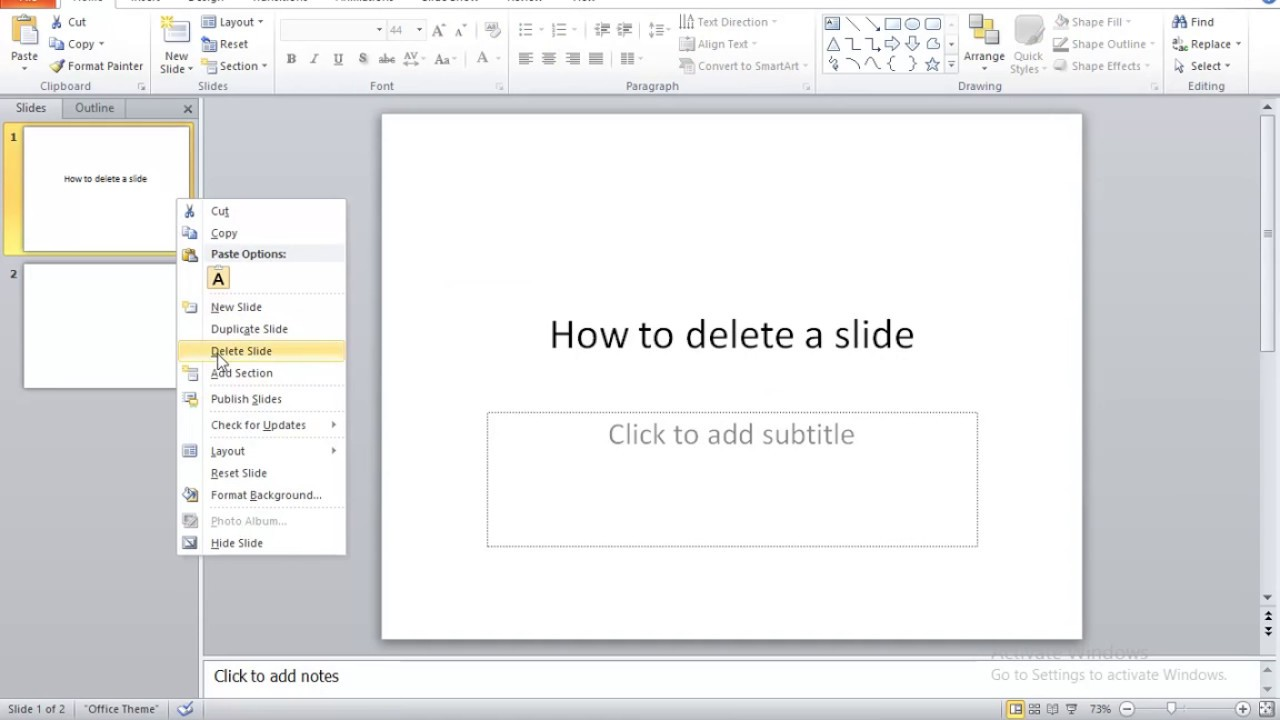
12. How To Delete A Slide In PowerPoint?
Below are the steps on how to delete a slide in PowerPoint:
- Choose your slide.
- You can remove one or more slideshows at the same time:
- Delete a single slide by right-clicking and selecting Delete Slide.
- Hold Ctrl and choose the slideshows you want, now right-click and locate Delete Slide
For more information check: https://www.youtube.com/watch?v=v4uTj62d7sA
Secret Classroom Presentation Hack
If by any chance, you insert or create a slide not favourable for a classroom presentation, you won’t have to worry anymore. Just simply delete it with one click. This also keeps your presentation flexible and you can easily add or remove slides as you go along.
13. How To Insert A GIF Into PowerPoint?
You can insert an animated GIF (or cartoon) into a PowerPoint presentation in the same way that you would any other photo file. You may enter a GIF file from your computer’s storage disk or Dropbox. Follow the below steps to know how to insert gif into PowerPoint.
- Choose the slide on which you wish to attach the dynamic GIF.
- Select Picture > Picture from File on the Home tab of the menu.
- Browse to the folder of the moving GIF you wish to include, make sure the data file ends in.gif, pick the image, and afterward, PowerPoint choose Insert.
For more information check: https://www.youtube.com/watch?v=Q84D5PDiUfQ
Secret Classroom Presentation Hack
GIFs can be cute and fun to look at. So, why not add relevant GIFs in certain slides to make the class enraptured by the whole lecture? Visual learners will greatly benefit from such content.
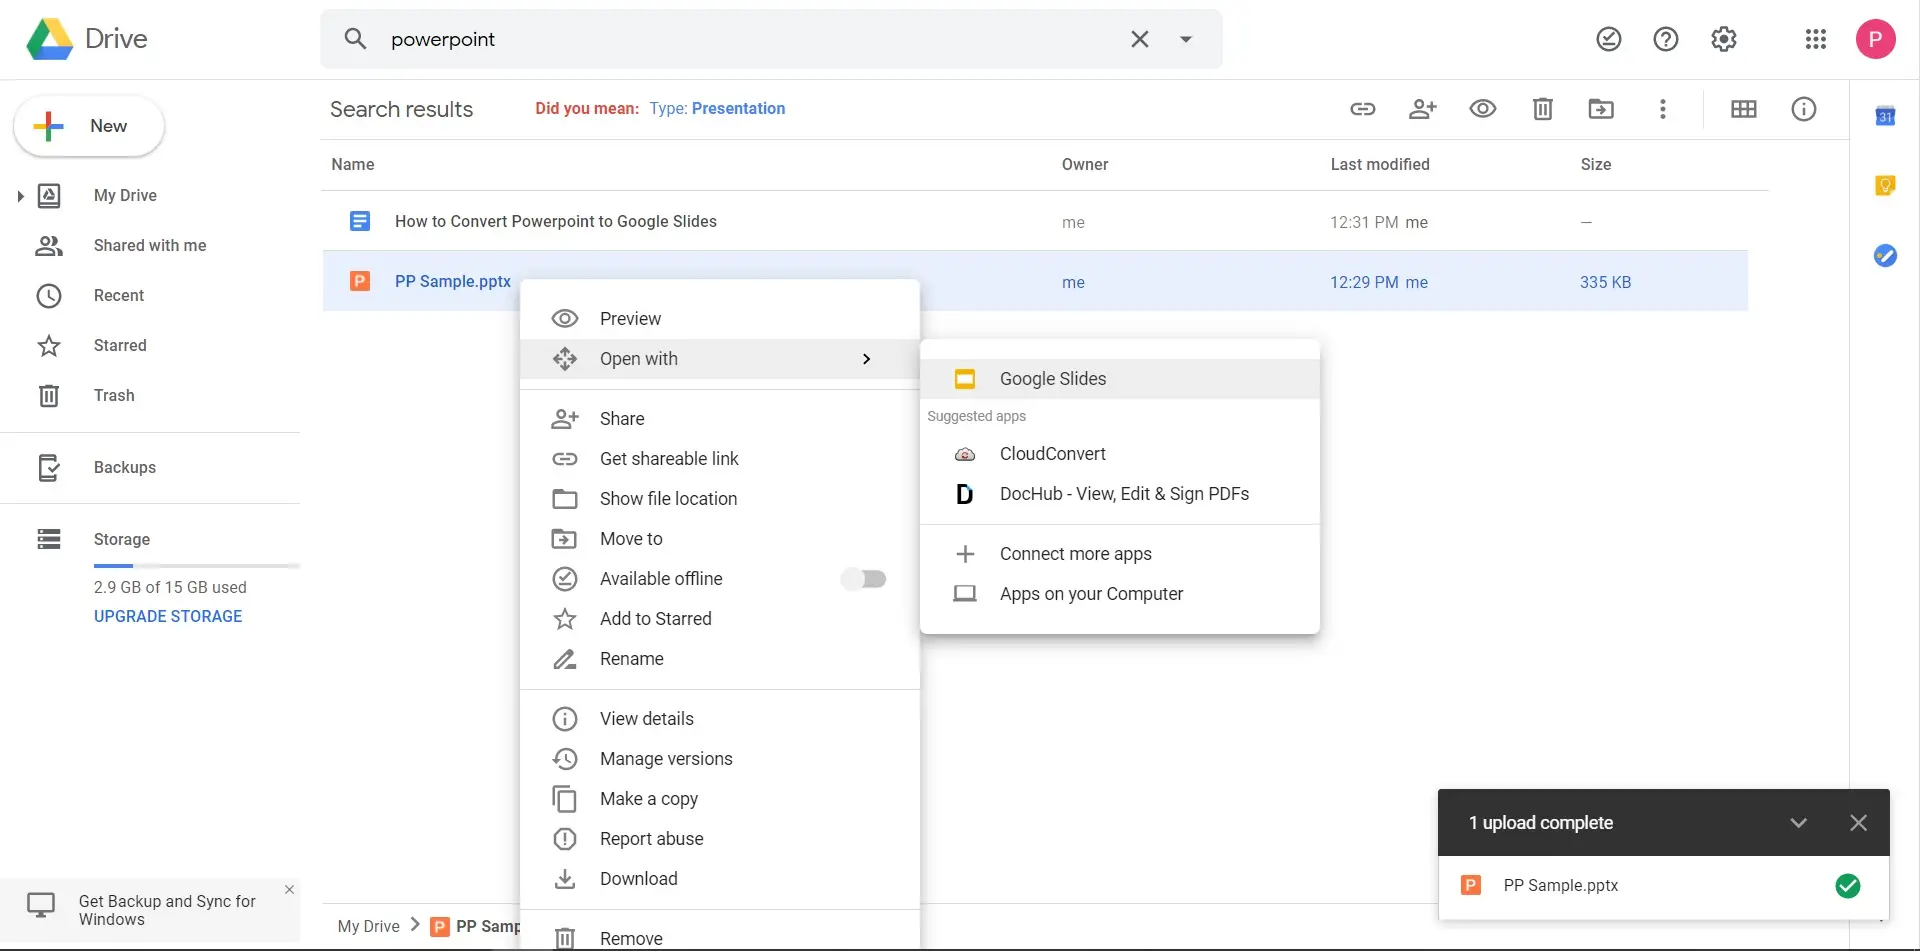
14. How To Convert PowerPoint To Google Slides?
Google Drive has transformed group collaboration by offering tools that allow numerous individuals to create and modify documents at the same time. When working alone, though, many people still choose to utilize the Microsoft suite of applications.
This might be an issue if you use Microsoft PowerPoint to produce a presentation when you want to distribute it to colleagues for comments or adjustments. Below we have mentioned complete steps on how to convert PowerPoint slides to Google slides.
By importing a PowerPoint document, you may convert it to Google Slides.
- Launch Google Drive.
- In the top left-hand corner of the screen, click “New.”
- Click the “Upload File” button.
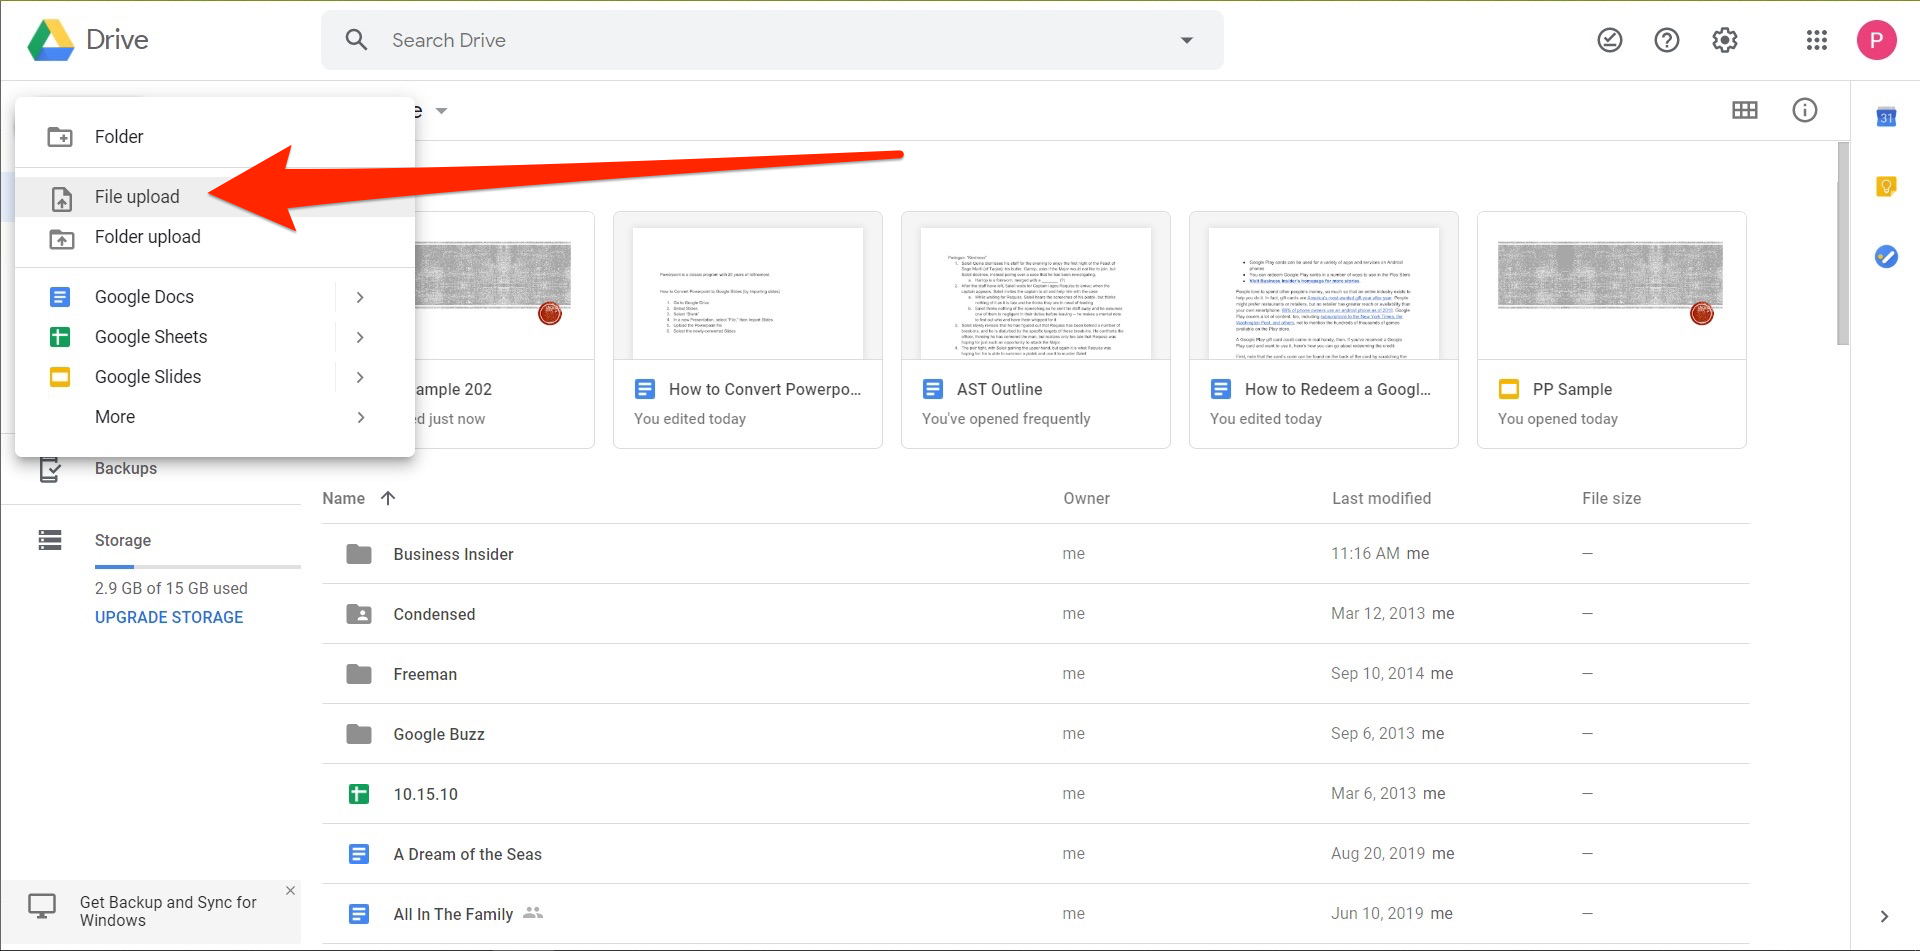
- Choose the PowerPoint document you want to use.
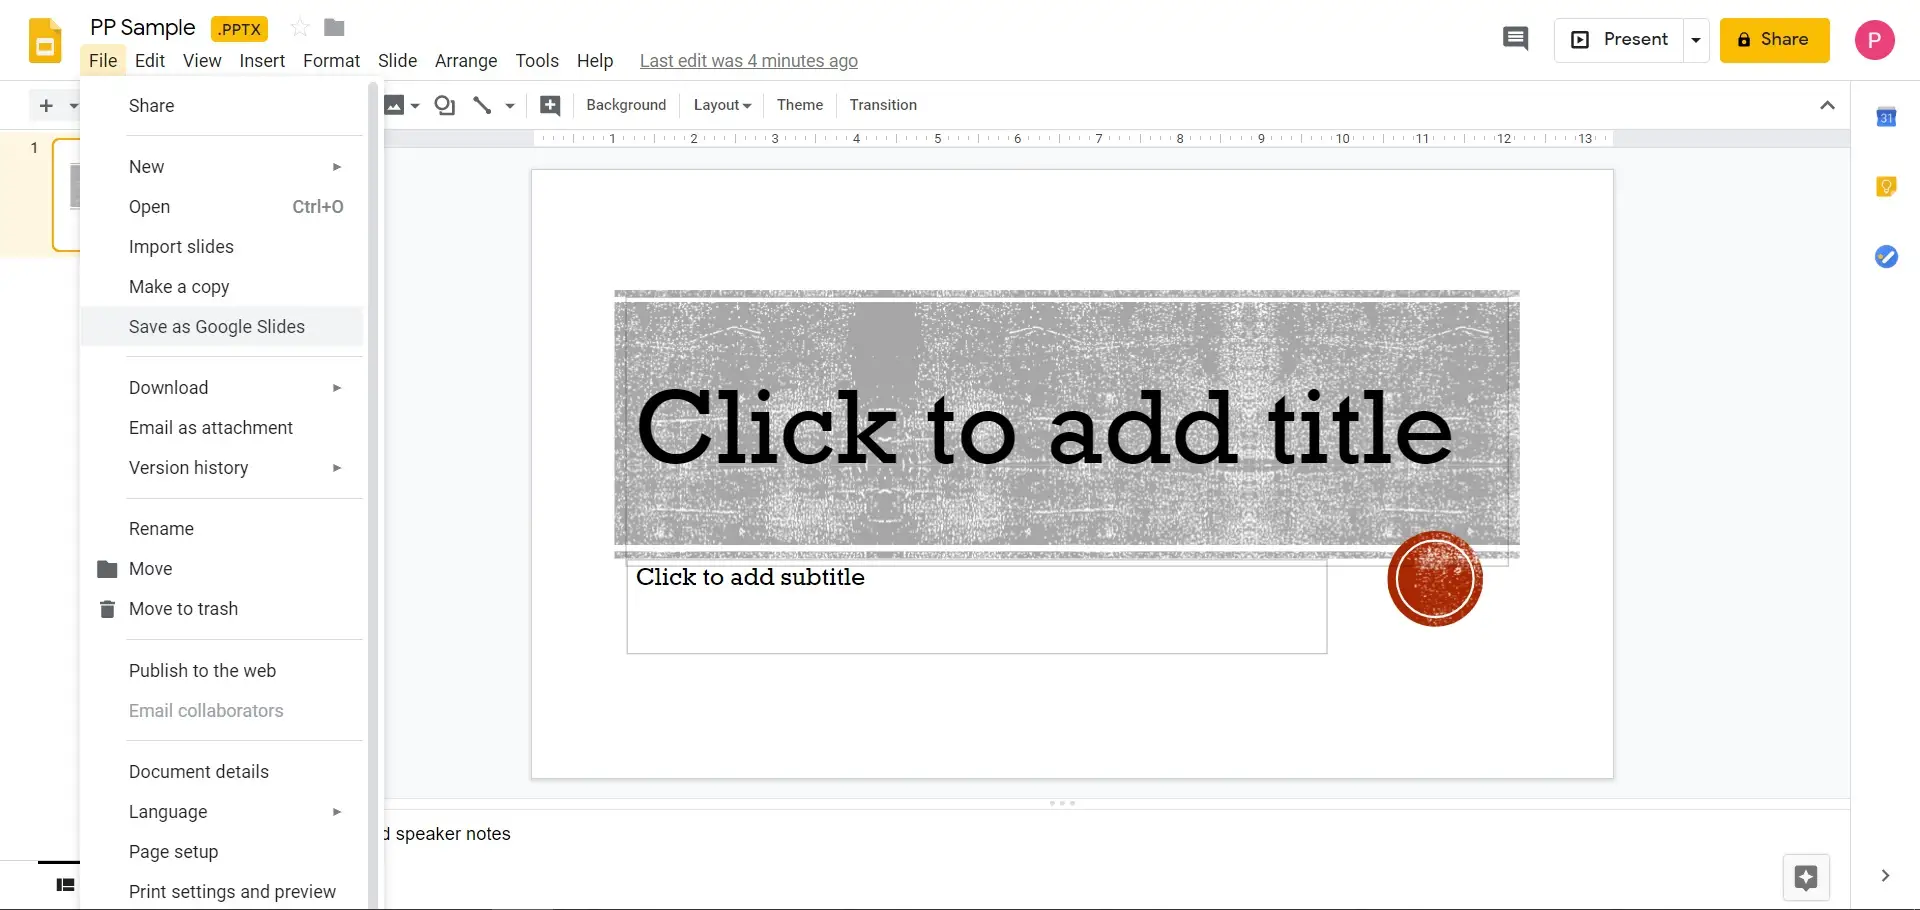
- After publishing, right-click and choose “Open With,” then “Google Slides.”
- Click the “File” button.
- Click the “Save as Google Slides” button.
There is another way:
Importing PowerPoint slides into Google Slides to transform a PowerPoint to Google Slides
- Navigate to Google Drive.
- Choose Slides.
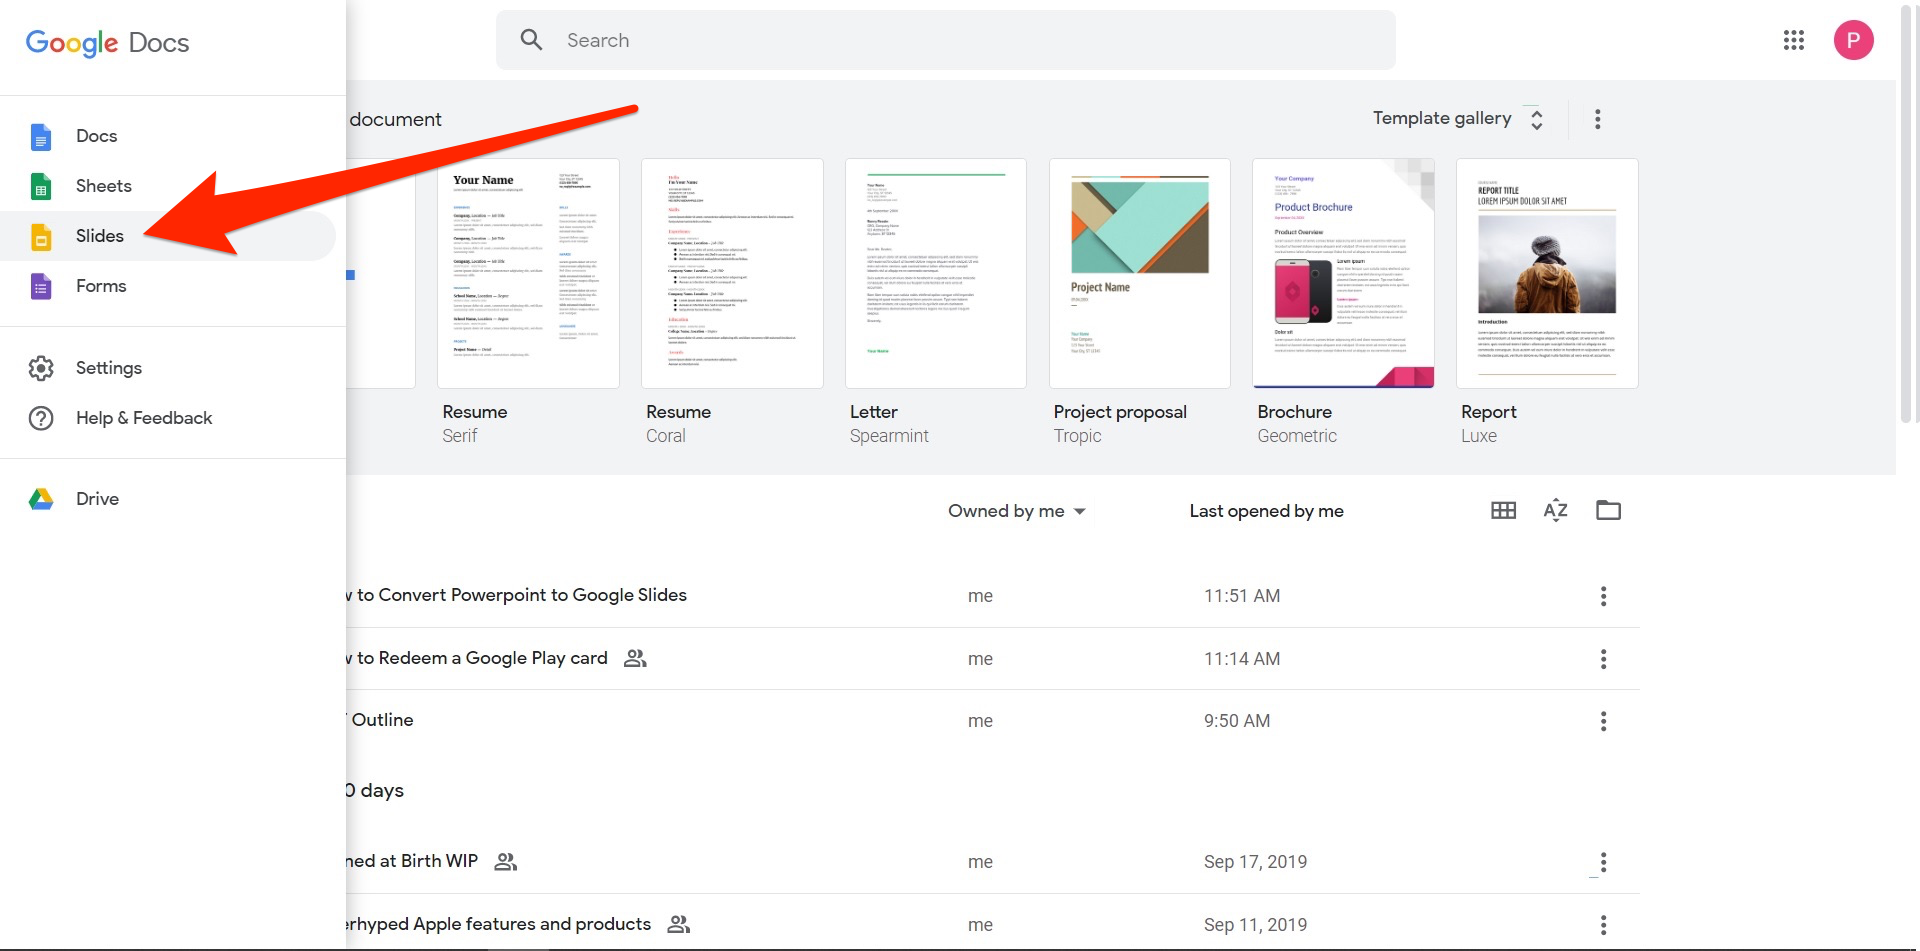
- Begin by opening a “Blank” document.
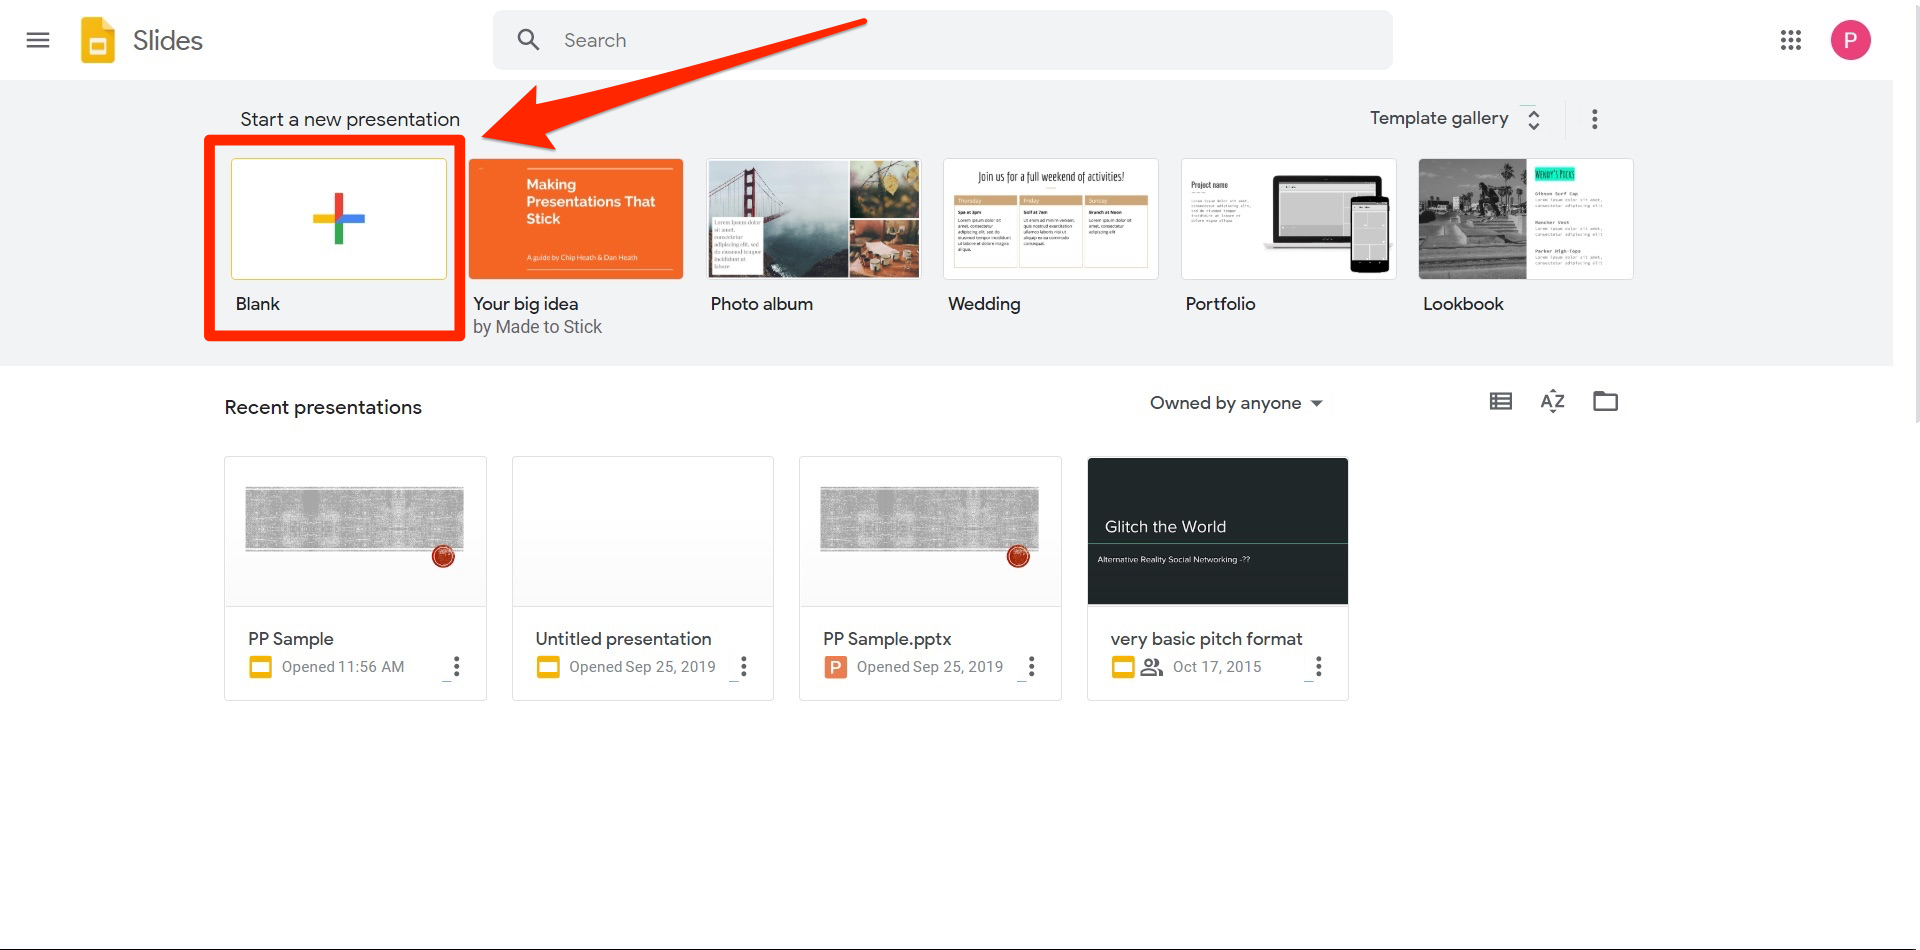
- Pick “File,” and “Import Slides” in a fresh Presentation.
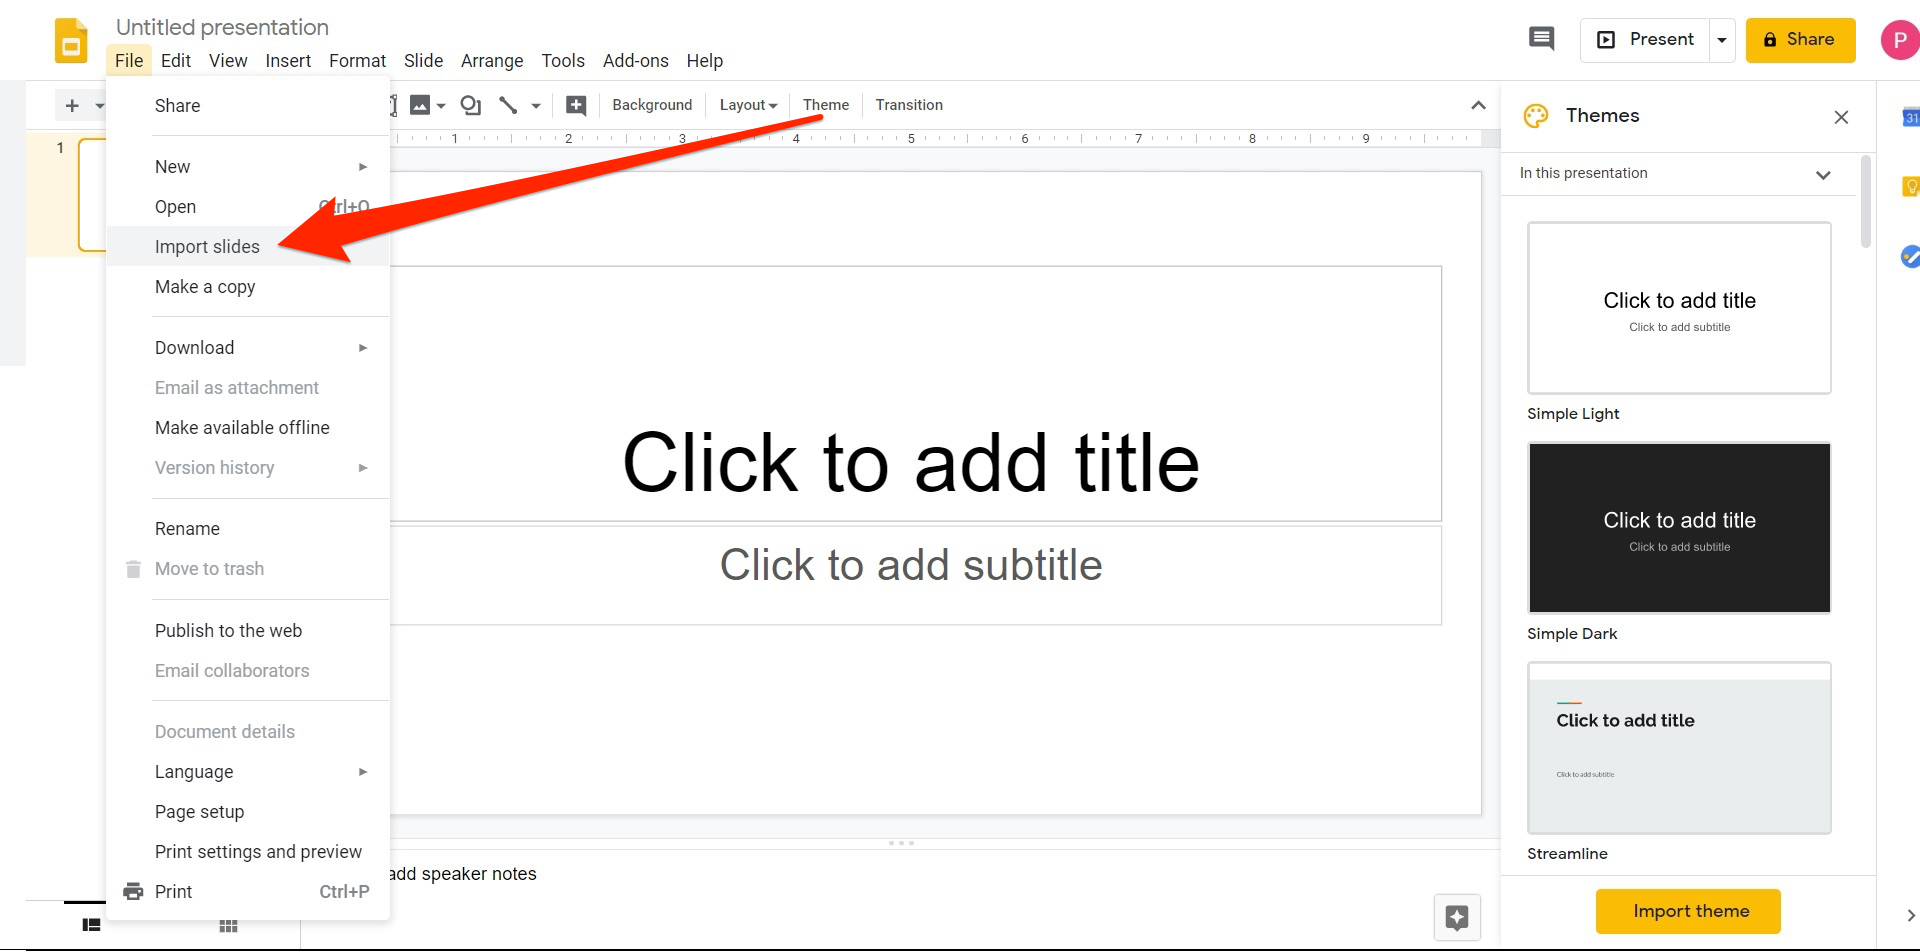
- Save the PowerPoint file to your computer.
- Go to the recently converted Slides folder.
A Glance At Google Slides & its Best Features
Google Slides is an excellent tool for generating professional presentations that can be easily shared.
Even if you understand the fundamentals of Google Slides, you could be unaware of all its capabilities.
There are some fantastic strategies you can utilize to conserve energy and create an even larger impression with your Google Slides demonstration, but you can’t utilize those if you don’t understand what they are.
How To Use Google Slides?
1. Begin Using Google Slides
Google Slides is the company’s premier presentation program, and it is available on the web as a component of Google Drive. Consider Slides to be the presenting tool for Google Docs and Google Forms. It’s absolutely free to use—the only requirement is that you have a Google account.
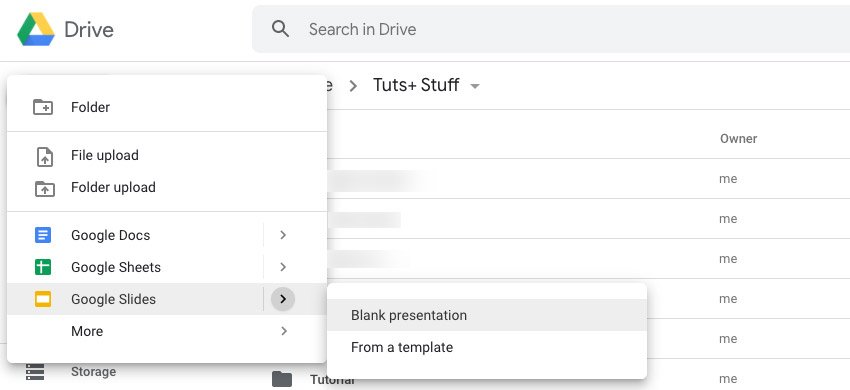
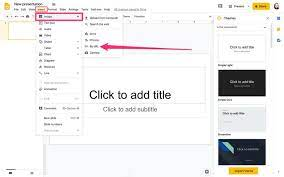
2. Create a new presentation
Go to Google Drive after you’ve logged into your Google Account. Create a Google PowerPoint by going to File > New > Google Slides > Blank Presentation. You’ll be sent to a different page with an empty presentation.
For more information check: https://cms-assets.tutsplus.com/cdn-cgi/image/width=850/uploads/users/151/posts/35331/image/new-google-slides-blank-presentation.jpg
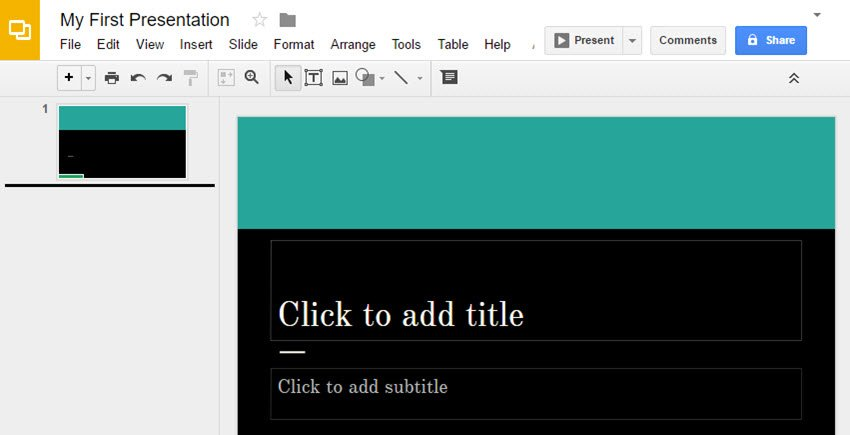
3. Adding Title and Subtitle
- Click wherever it says to add title and write in the name of the Google slideshow to add a title. You may also provide a caption or leave it empty.
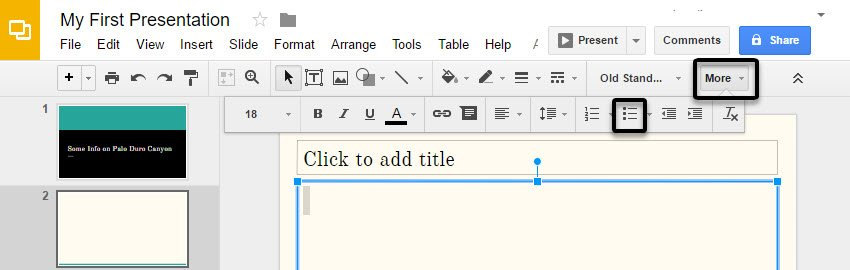
4. Adding More Slides and working on them
- Once you’re satisfied with the design of the title slide, you may proceed with the rest of your show. Click the Plus button in the upper left corner of the screen to add new slides. This will build a new slideshow with a Title and Body arrangement.
- Click More to show additional text possibilities, then select the body checkbox to display more text options. This enables you to make a bulleted list.
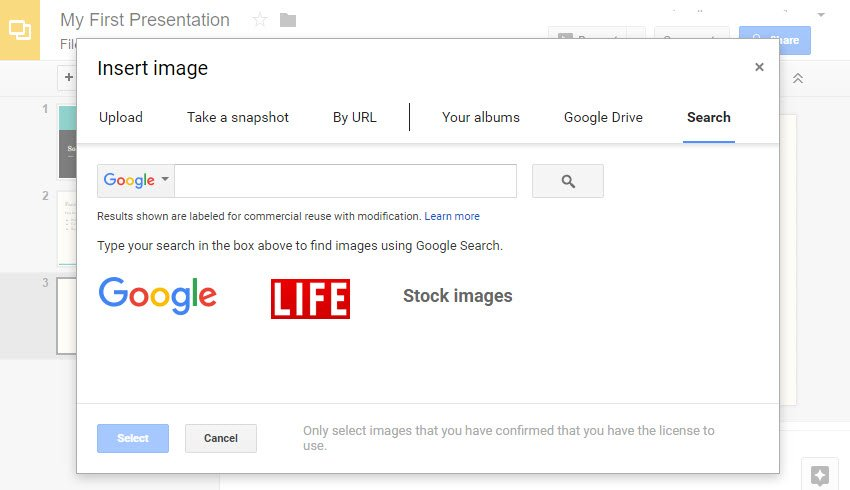
5. Uploading Pictures to Slides
- There are various methods for including photos in your presentation. Upload a picture from your computer, Google+ account, or Google Drive. Use a webcam to take a photograph. Alternatively, use the Insert picture window to search Google or stock photographs.
6. Adjusting Motions and Transitions in Slides
- Click the Transition button to add a segue. An Animations sidebar will emerge, and you can then adjust the motions in your Google presentation from there.
- The Slide submenu controls the animations that occur between slides. There are six different ways to transition. Select an option from the drop-down list.
![]()
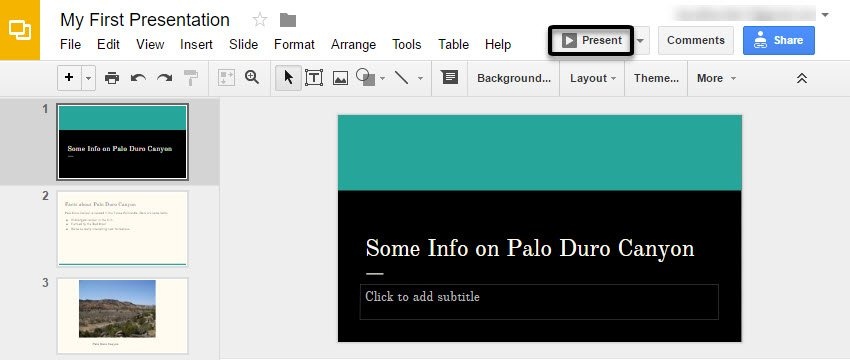
7. Slide Presentation
- After you’ve done the lecture, select the Present icon to show off your skills.
8. How To Add Audio To Google Slides?
Below are steps to be followed to know how to add audio to Google slides:
- At the top, select the “Insert” tab.
- Inside this “Insert” drop-down menu, choose “Audio.”
- Locate the audio track you wish to put in your Google Drive.
- The playback bar allows users to play, stop, and go forward.
- You may modify your soundtrack on the left side.
For more information check: https://www.youtube.com/watch?v=7HgPaeCVViA
Secret Classroom Presentation Hack
This is a great tool to use if a teacher feels sick or is on leave. All they must do is record their audio and give the presentation to someone else to be played on the specified dates.
9. How To Embed A Video/YouTube Video In Google Slides?
Embedding A Video In Google Slide:
- Pick the Video alternative from the dropdown menu by clicking the Insert tab. Insider/Abbey White
- Choose which YouTube clip you want to include in your Google Slides demonstration.
- Copy and paste the URL of the desired YouTube video into the text field.
- Choose the video from your Drive that you wish to publish to Google Slides.

For more information head to Google.
Secret Classroom Presentation Hack
It will be more engaging for a classroom presentation if you incorporate a video related to the topic you are presenting or even one of a recent class trip related to the topic. Videos might enhance the discussion and participation among students, and they can even add their own videos from a school project to expand the presentation.
10. How To Add Music To Google Slides?
- Google Slides does not allow you to attach audio files to slideshows, but it does allow you to upload videos.
- You may play the music by immediately adding a YouTube video to your show and using the video player performance settings.
- The video will play until you advance to the next page.
11. How To Delete A Slide In Google Slides?
- Open a Google Slides slideshow on your PC.
- Select the slide you wish to erase on the left. If you wish to remove multiple slides, hold down the Shift button and click them at the same time.
- On your keypad, click Delete or Backspace.
12. How To Insert A GIF Into Google Slides?
- Choose “Insert,” then “Image,” then lastly “By URL” from the top toolbar. First, choose “Insert” from the menu bar.
- Copy and paste the URL into the field. Insert the URL of your GIF here.
- When the GIF appears, click “Insert.” Select “Insert” from the drop-down menu.
For more information check: https://www.youtube.com/watch?v=V0NzmFTyz8U
Google Slides or PowerPoint – have you decided?
Hopefully, our extensive guide on how teaching staff, tutors, or students can create the best (virtual) classroom presentations with Google Slides and PowerPoint has provided some valuable insights. With the advent of ongoing online classes and eLearning as well as online teaching and tutoring, these presentations have become crucial for all educators and learners.
If you are a teacher, lecturer, or tutor, you can be assured that your students are going to pay the utmost attention to such a visually engaging class presentation with either program as both offer various useful features. And, if you are a student, you can be certain that you are going to impress your teachers and classmates with these presentation ideas and obtain the highest grades.
Author Profile

- Editor in Chief
- Blogger and Educator by Passion | Senior Online Media & PR Strategist at ClickDo Ltd. | Contributor to many Education, Business & Lifestyle Blogs in the United Kingdom & Germany | Summer Course Student at the London School of Journalism and Course Instructor at the SeekaHost University.
Latest entries
 Directory PostsJune 29, 202614 Top-Rated Math Apps for Kids
 Directory PostsJune 20, 2026The 13 Best Online Tutoring Platforms in the UK
 Directory PostsMay 18, 202611 Hot Discount Schemes Teachers Must Know
 careerApril 7, 2026Top 7 In-Demand EdTech UK Careers & Jobs


